The types of peppers used in our chili garlic hot sauce can vary depending on the specific recipe and desired flavor profile.
However, common varieties of peppers that may be used include:
Red Chili Peppers: These peppers are known for their vibrant red color and range in heat level from mild to very spicy. Common types include Fresno, cayenne, and Thai chili peppers.
Jalapeño Peppers: Jalapeños are medium-sized green peppers that are often used in hot sauces. They have a moderate level of heat and a slightly sweet flavor.
Habanero Peppers: Habaneros are small, orange or red peppers that pack a significant amount of heat. They have a fruity flavor with intense spiciness, making them a popular choice for adding heat to hot sauces.
Serrano Peppers: Serranos are similar in appearance to jalapeños but are smaller and hotter. chilli garlic hot sauce They have a bright, grassy flavor with a medium to high level of heat.
Bird’s Eye Chilies: Also known as Thai chilies, bird’s eye chilies are tiny, slender peppers that are extremely spicy. They have a fruity and floral flavor profile with intense heat.
Scotch Bonnet Peppers: These peppers are similar in heat level to habaneros but have a slightly sweeter and fruitier flavor. They are commonly used in Caribbean and West African cuisines.
Ghost Peppers: Ghost peppers, also known as Bhut Jolokia, are one of the hottest peppers in the world. They have a smoky, fruity flavor with an intense level of heat.
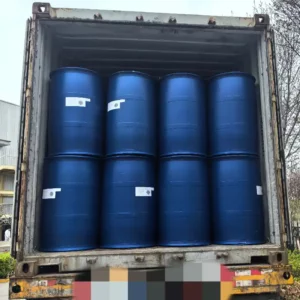
The specific combination of peppers used in our chili garlic hot sauce may vary based on factors such as availability, desired heat level, and flavor profile. The peppers are typically blended with garlic and other ingredients to create a flavorful and spicy sauce that adds a kick to a variety of dishes.
The garlic chili in our hot sauce plays a crucial role in complementing the overall flavor profile, enhancing its complexity and depth. Here’s how:
Bold Garlic Flavor: The presence of garlic in the hot sauce adds a robust and aromatic element to the flavor profile. Garlic brings its distinctive pungency and earthy sweetness, which serves as a flavorful foundation for the sauce.
Heat and Spice: The chili peppers contribute heat and spice to the hot sauce, adding a fiery kick that tingles the taste buds. This heat level can vary depending on the variety of chili peppers used, ranging from mild to intensely spicy.
Balanced Flavor: When combined with garlic, the chili peppers create a harmonious balance of flavors. hot garlic chili sauce The garlic’s sweetness and depth help to temper the heat of the chili peppers, ensuring that the sauce is not overwhelmingly spicy but instead offers a well-rounded and satisfying taste experience.
Aromatic Complexity: Both garlic and chili peppers are aromatic ingredients that contribute layers of complexity to the sauce’s aroma. The combination of these ingredients results in a fragrant and enticing scent that tantalizes the senses and whets the appetite.
Versatility: The garlic chili flavor profile of the hot sauce makes it incredibly versatile and suitable for a wide range of dishes. It can be used as a condiment, marinade, or cooking ingredient, adding depth and dimension to everything from grilled meats and stir-fries to tacos and sandwiches.
Overall, the garlic chili in our hot sauce plays a vital role in elevating its overall flavor profile, imparting boldness, heat, and complexity that make it a standout condiment for spice enthusiasts and flavor aficionados alike.
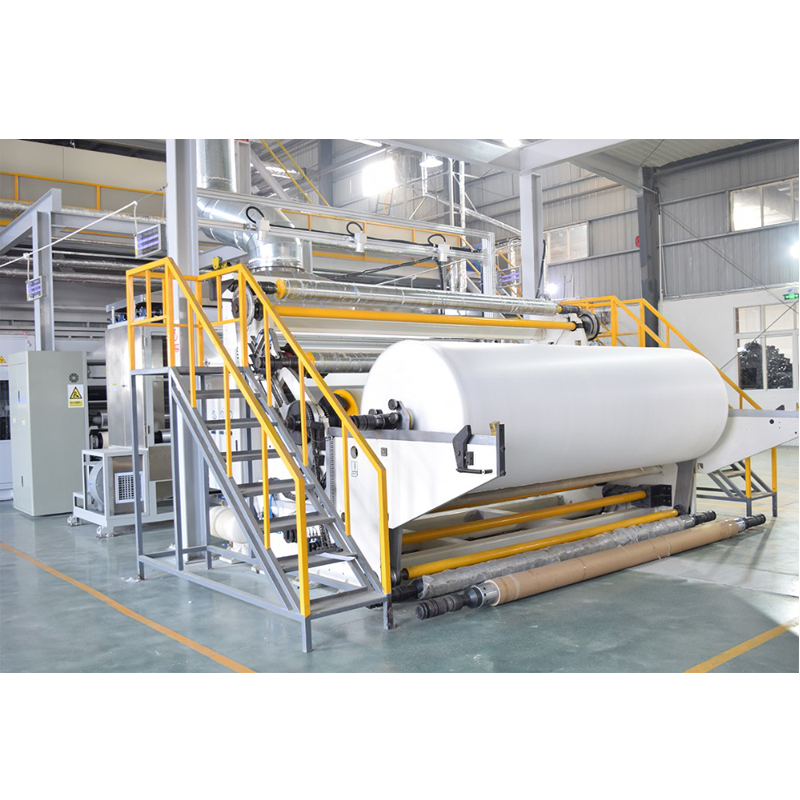
Ensuring uniformity in material density is crucial for nonwoven fabric making machines to produce high-quality fabrics.
Here are several ways in which these machines ensure uniformity in material density:
Precise Metering and Feeding Systems: Nonwoven fabric making machines are equipped with metering and feeding systems that accurately control the flow of raw materials. These systems ensure consistent material input, preventing variations in material density throughout the fabric.
Uniform Web Formation Techniques: The process of web formation, such as carding, air-laying, or wet-laying, is designed to distribute fibers evenly across the fabric. By ensuring uniform web formation, nonwoven fabric making machines promote consistent material density throughout the fabric.
Fiber Blending and Mixing: Some nonwoven fabric making machines allow for blending and mixing of different types of fibers to achieve desired properties. By blending fibers homogeneously, these machines ensure uniform material density in the final fabric.
Calibration and Adjustment: Nonwoven fabric making machines are calibrated and adjusted to maintain precise processing parameters, such as line speed, air pressure, and temperature. These adjustments are crucial for controlling material density and ensuring uniformity in the fabric.
Compactness and Compression Techniques: Certain nonwoven fabric making processes, such as needle punching or hydroentanglement, involve compacting and compressing the material to enhance cohesion and density. By applying controlled pressure, these techniques ensure uniform material density across the fabric.
Real-time Monitoring and Control Systems: Advanced nonwoven fabric making machines are equipped with real-time monitoring and control systems that continuously monitor key parameters such as material thickness and density. nonwoven fabric making machine These systems adjust processing parameters dynamically to maintain uniformity in material density throughout production.
Quality Assurance Measures: Nonwoven fabric making machines undergo rigorous quality assurance measures, including sampling, testing, and inspection of produced fabrics. By identifying any variations in material density, these measures ensure that only fabrics meeting quality standards are released for further processing or use.
Operator Training and Expertise: Skilled operators are essential for operating nonwoven fabric making machines effectively. Proper training and expertise enable operators to monitor production processes, identify potential issues affecting material density, and take corrective actions as needed to maintain uniformity in the fabric.
By implementing these techniques and measures, nonwoven fabric making machines ensure uniformity in material density, resulting in high-quality fabrics with consistent properties and performance.
How does the China nonwoven fabric making machine handle changes in material elasticity or stretchability?
Nonwoven fabric making machines, including those manufactured in China, are designed to handle changes in material elasticity or stretchability to produce fabrics with consistent properties.
Here’s how they typically address variations in material elasticity or stretchability:
Adjustable Tension Control: Nonwoven fabric making machines often feature adjustable tension control systems that regulate the tension applied to the material during processing. Operators can adjust tension settings to accommodate changes in material elasticity and ensure uniform stretching or relaxation of the fabric.
Variable Speed Control: Some nonwoven fabric making machines offer variable speed control, allowing operators to adjust the speed of various components such as rollers, belts, or conveyors. By varying the speed, operators can control the stretching or relaxation of the material as it moves through the machine.
Customizable Process Parameters: Nonwoven fabric making machines allow operators to customize process parameters such as temperature, pressure, and dwell time to suit the characteristics of different materials. By adjusting these parameters, operators can optimize the elasticity and stretchability of the fabric during production.
Flexible Web Formation Techniques: Fabric making machines employ various web formation techniques such as carding, air-laying, or spunbonding, each of which affects the elasticity and stretchability of the resulting fabric. China nonwoven fabric making machine Operators can choose the most suitable web formation technique based on the desired properties of the fabric.
In-line Monitoring and Feedback Systems: Advanced nonwoven fabric making machines may incorporate in-line monitoring and feedback systems that provide real-time data on material properties such as elasticity and stretchability. Operators can use this information to make immediate adjustments to process parameters and ensure consistent fabric quality.
Hydroentanglement or Spunlacing: Hydroentanglement or spunlacing is a process that uses high-pressure water jets to entangle fibers and consolidate the fabric structure. This process can be adjusted to control the degree of entanglement and thus the elasticity and stretchability of the fabric.
Needle Punching: Needle punching is a mechanical process that involves punching barbed needles through the fabric to interlace and consolidate the fibers. By adjusting the needle density and penetration depth, operators can control the elasticity and stretchability of the fabric.
Quality Assurance and Testing: Nonwoven fabric making machines undergo rigorous quality assurance testing to ensure that they can handle changes in material elasticity and stretchability. Fabric samples are tested for elasticity, stretchability, and other mechanical properties to verify that they meet quality standards.
By implementing these features and practices, nonwoven fabric making machines manufactured in China can effectively handle changes in material elasticity or stretchability, resulting in fabrics with consistent properties and performance.
The purpose of this article is to inform you about the basics of micro-sprinkler irrigation so as to determine whether it is the right fit for your project.
Using water more efficiently has become increasingly important to the farming industry. Precision irrigation has stepped in as a hero in this plight.
Precision irrigation has the aim of giving the crop exactly what it needs at the exact right time. Depending on a host of factors, micro-sprinkler irrigation may be just the right precision tool for the job.
Micro-sprinkler irrigation is often perceived as a wasteful or non-precise irrigation method, especially when compared to drip irrigation. If the system is however designed in a smart and efficient way and all the necessary aspects are considered, high water-use efficiency can be achieved with this irrigation method.
An informed decision must be made, comparing all suitable types of irrigation to find the best fit for your circumstances.
The ins and outs
Micro-sprinkler irrigation is used for low volume irrigation and can be used in various irrigation systems, including overhead irrigation on vegetables and in nurseries, surface irrigation in orchards, overhead irrigation greenhouses and frost protection. It can help the farmer use water more efficiently and can bring about improved yields – all due to overall better water management.
Some localised micro-sprinkler irrigation systems also make it possible to apply fertiliser through the irrigation system. This brings about higher, although not the highest, efficiency in fertiliser application and may help the farmer save on fertiliser and labour costs. Note that the control of weeds and careful planning around the placement of sprinklers, become crucial in this context.
Pros and cons
Irrigating with micro sprinklers allows for both full-surface irrigation and localised irrigation. An advantage of micro-sprinkler irrigation compared to drip irrigation is that a larger soil volume can be wetted, making irrigation management easier. Another advantage is that emitter blockages are more visible.
A few disadvantages of micro-sprinkler irrigation systems compared to drip irrigation, include:
Higher evaporation losses and run-off during water application and from the soil surface.
Not being able to work in the orchard during active irrigation.
Higher maintenance costs due to possible damage caused by workers in the orchards.
Remember, that the physical inspection of micro sprinklers is important due to the higher possibility of emitter damage.
Proper management of micro-sprinkler irrigation systems is important, and it is necessary to do regular tests in the field to check the soil moisture levels at different depths. This will indicate whether too much or too little water is being applied.
Micro-sprinkler irrigation can be very beneficial when applied in, for example orchards, if the correct sprinkler is selected, if water penetration is good and run-off can be prevented, and where cover crops are planted between the tree rows. It is also an ideal choice for non-row cropping where drip irrigation is not suitable. Also remember that in greenhouses and nurseries, micro sprinklers are not only used for irrigation but also for cooling and humidity control.
Designing a suitable system
To design a micro-sprinkler irrigation system, you will first need to calculate the ETc (crop water requirement) for the crop in the specific area. Design the system according to the highest ETc value in a year, so that the water supply will be sufficient under those circumstances. This should indicate whether the farm will have enough water to implement the system for a certain crop.
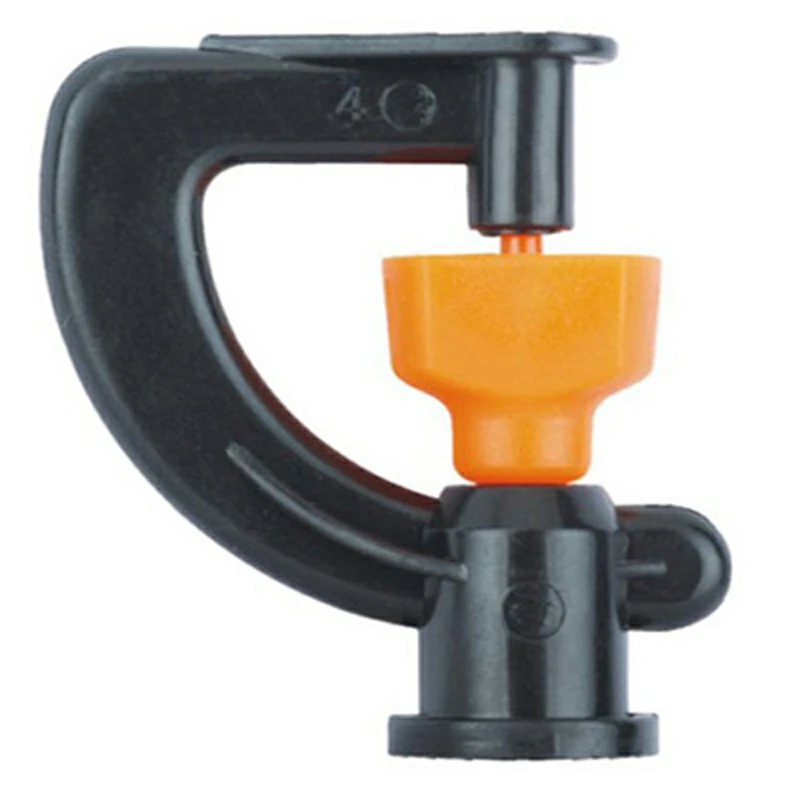
When choosing the correct micro sprinkler, it is important to know the infiltration capacity of your soil, so that you can match the selected flow rate of the micro sprinkler to the infiltration capacity of the soil. On a heavier soil with high clay content, for example, it would be better to use a micro-sprinkler with a lower flow rate, to ensure good water distribution in the soil profile. If the flow rate is not matched to the infiltration capacity of the soil, run-off will occur.
It is also important to match the wetted diameter of the micro sprinkler to the size of the crop’s root zone and to inspect technologies that allows the wetted diameter to be adapted to the increasing size of the root zone as the crop develops.
Once the correct flow rate and wetted diameter has been identified, and you must choose between similar products. Select a micro sprinkler with the largest possible nozzle opening, as this will make it much less susceptible to clogging. It is also important to choose a micro sprinkler with insect protection, as insects entering the sprinkler is a regular occurrence.
Finally, to ensure uniform water delivery, remember to select a pressure-compensated micro sprinkler if the topography of your field requires it. A host of other factors will influence your decision on which micro sprinkler to use and how to apply it. Decisions must be made based on sprinkler spacing, sprinkler height and more.
Proven quality
Most importantly, do not waste your money and time on a poor-quality micro sprinkler. A new orchard, vegetable field or greenhouse is a massive investment and you must do everything you can to protect this investment and ensure that it delivers optimal return on investment. Firstly, make sure that you choose the correct type of irrigation system. Once you have determined this system to be micro-sprinkler irrigation, always select a micro sprinkler with a proven track record.
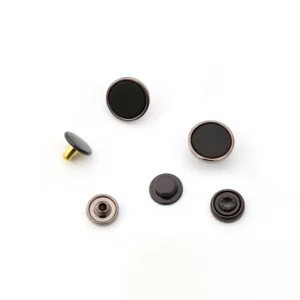
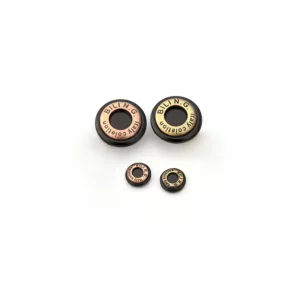
This set includes both jeans buttons and metal button snap fasteners. Always have the right button at hand when you need a quick repair or if you’re looking for a suitable closure for that handmade garment or accessory.
All of the buttons in this set are sturdy, durable, and rust proof which makes them perfect for coats, hats, jackets, overalls, backpacks, leathercraft, and different accessories.
Replace an old button or add a no-sew button to any project quickly: a pair of jeans, a jacket, or a leather bag. You don’t even need sewing skills to install these buttons.
You’ll get 80 metal snap buttons in 4 different colors with the tools to install them properly, 20 jeans buttons in three different designs and a clear plastic storage box with dividers. This set is easy to carry and store.
Box Quantity: 80 metal snap fasteners + 20 metal jeans buttons
Box size: 3.46 x 2.48 x 0.83 inches
Snap buttons
1 snap = a (female) cap, a socket, a stud, and a close post (or a male cap)
Size: the diameter of the cap is approx ½ inch (12.5 mm)
Material: made of copper zinc alloy with a nickel-free plating
Colors: silver, bronze, gold, gun metal
The set contains:
20 silver snaps
20 bronze snaps
20 golden snaps
20 gunmetal snaps
Tools: hole puncher + 2 anvils + a base
Jeans buttons
1 button = a top button and a tack (or nail).
Size: cap 11/16 inch x 5/16 inch (17x 8mm), nail 5/16 inch (8mm)
The cost of metal shank button production can be influenced by several primary factors:
Material Cost: The type of metal used in the production of shank buttons greatly impacts the cost. Higher-quality metals such as brass or stainless steel tend to be more expensive than lower-cost options like aluminum or zinc alloy. Additionally, fluctuations in metal prices in the global market can affect material costs.
Design Complexity: Intricate or custom designs require more labor and often specialized equipment, which can increase production costs. Simple designs with fewer details are generally less expensive to manufacture.
Production Volume: Economies of scale come into play with production volume. Larger production runs typically result in lower per-unit costs due to spreading fixed expenses across a greater number of units. Conversely, smaller production runs may have higher unit costs.
Finishing Processes: The finishing processes applied to metal shank buttons, such as polishing, plating, or coating, can significantly affect the cost. metal shank button Finishes that require multiple steps or specialty treatments may add to the overall production expense.
Quality Standards: Adherence to stringent quality standards and certifications may necessitate additional testing and inspection procedures, which can increase production costs. Ensuring consistency and meeting regulatory requirements often involves investments in quality control measures.
Labor Costs: Labor costs, including wages, benefits, and overhead associated with skilled workers involved in button production, impact the overall cost. The complexity of the manufacturing process and the skill level required can influence labor costs.
Tooling and Equipment: Investment in specialized machinery, dies, molds, and tooling required for metal button production contributes to the initial setup costs. Maintenance and depreciation of this equipment also factor into the overall production cost.
Packaging and Transportation: Packaging materials, labeling, and transportation costs from the manufacturing facility to distribution centers or customers can add to the total cost of production.
Market Demand: Fluctuations in market demand and competition within the industry can influence pricing strategies. High demand may drive prices up, while oversupply or decreased demand may lead to price reductions.
Environmental Regulations: Compliance with environmental regulations and sustainability initiatives may require investments in eco-friendly practices or materials, which can affect production costs.
Overall, a combination of these factors contributes to the total cost of metal shank button production. Manufacturers must carefully manage these variables to maintain competitiveness in the market while meeting quality standards and customer expectations.
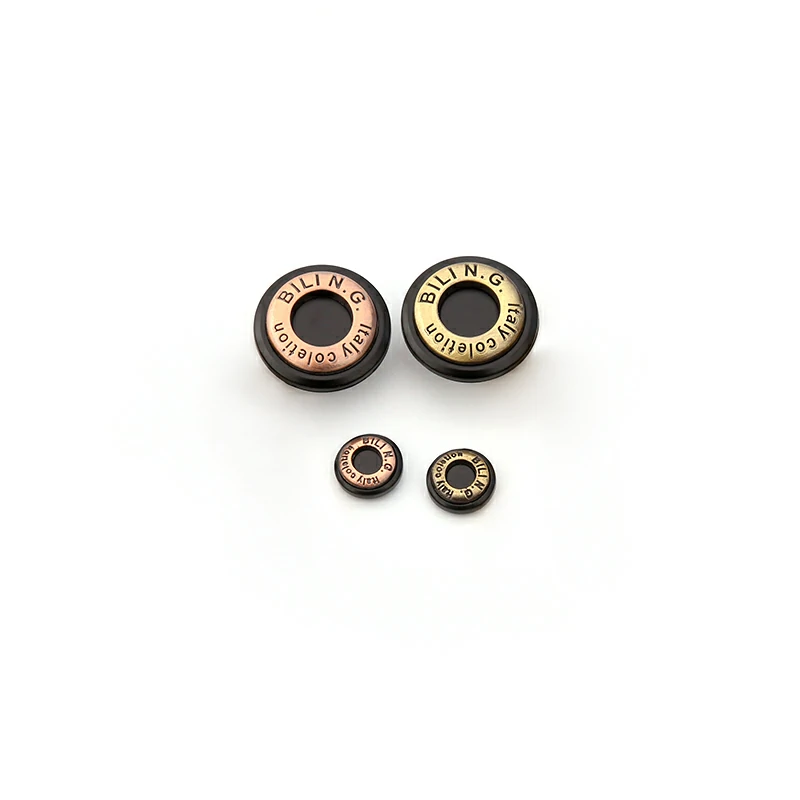
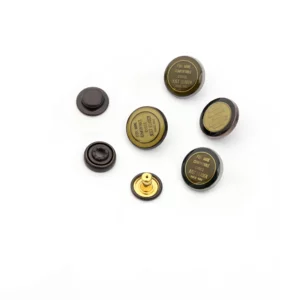
Several materials are commonly used in the production of metal buttons for clothing. These materials vary based on the desired appearance, durability, and cost.
Some of the most common materials include:
Brass: Brass is a popular choice due to its durability, corrosion resistance, and ability to be easily molded into various shapes. It can also be finished in different ways to achieve a range of appearances, from polished to antique.
Stainless Steel: Stainless steel buttons offer excellent corrosion resistance and strength, making them suitable for heavy-duty or outdoor clothing applications. They can be polished or coated for different finishes.
Aluminum: Aluminum buttons are lightweight and often used for casual or fashion-oriented clothing items. They can be anodized or coated for color options and increased durability.
Zinc Alloy: Zinc alloys, such as zamak, are popular for their affordability and ability to mimic the appearance of other metals like brass or pewter. metal buttons for clothing They can be plated with various finishes to achieve desired aesthetics.
Nickel: Nickel buttons are known for their shiny appearance and resistance to tarnishing. They are often used in formal or dress clothing but may cause allergic reactions in some individuals.
Copper: Copper buttons offer a distinctive reddish-brown hue and are prized for their aesthetic appeal. They can be left untreated for a natural patina or coated to maintain their shine.
Tin: Tin buttons are lightweight and often used for decorative purposes or on lightweight clothing items. They can be painted, coated, or left untreated for a rustic appearance.
Pewter: Pewter buttons are made primarily from tin mixed with small amounts of copper, antimony, or other metals. They have a low melting point, making them easy to cast into intricate designs.
These materials can be used alone or in combination with each other to create unique button designs with varying aesthetics and functional properties. The choice of material depends on factors such as the desired appearance, cost considerations, and the intended use of the buttons in clothing production.
Yes, you can use blank leather patches with special features like glow-in-the-dark or reflective properties on jeans. These unique patches can add a distinctive and eye-catching element to denim garments, providing both style and functionality.
Here’s how you can incorporate them:
Glow-in-the-Dark Leather Patches: Glow-in-the-dark leather patches contain materials that absorb light during the day and emit it in the dark, creating a luminous effect. These patches can be attached to jeans as traditional leather patches, typically sewn onto the waistband or back pockets. They add a fun and playful touch to denim garments, especially in low-light or nighttime settings.
Reflective Leather Patches: Reflective leather patches feature materials that reflect light, making them highly visible in low-light conditions or when illuminated by headlights or other light sources. These patches are often used for safety or visibility purposes, such as on workwear or outdoor apparel. They can be sewn onto jeans in strategic locations to enhance visibility and add a stylish accent.
When using blank leather patches with special features like glow-in-the-dark or reflective properties on jeans, consider the following:
Placement: Choose strategic locations on the jeans where the patches will be most visible and effective. Common placement areas include the waistband, back pockets, or thighs.
Attachment: Attach the patches securely to the denim fabric using a strong adhesive or by sewing them onto the jeans. Ensure that the patches are firmly attached and will withstand regular wear and washing.
Compatibility: Verify that the leather patches are compatible with denim fabric and will not cause damage or discoloration. Test a small area of the fabric first to ensure compatibility before attaching the patches.
Care Instructions: Follow the care instructions provided by the manufacturer for the leather patches to maintain their special features and appearance. Avoid exposing the patches to harsh chemicals or abrasive materials that could diminish their effectiveness over time.
By incorporating blank leather patches with glow-in-the-dark or reflective properties onto jeans, you can enhance their visual appeal, add a unique touch, and even improve visibility or safety in certain environments.
Repairing a metal snap button on jeans that has become stretched or damaged typically involves replacing the button or repairing the existing button.
Here’s how you can repair a metal snap button on jeans:
Assess the Damage: Determine the extent of the damage to the snap button. If the button is simply loose or has come off but is still in good condition, it may be possible to repair it. However, if the button is cracked, chipped, or otherwise damaged beyond repair, it will need to be replaced.
Replace the Button: If the snap button is damaged beyond repair, you’ll need to replace it with a new one. Purchase a replacement snap button kit from a craft store or sewing supplies shop. The kit typically includes a new snap button, a socket, and a stud.
Remove the Old Button: Use a seam ripper or small scissors to carefully remove any remaining threads or fabric around the old snap button. Take care not to damage the surrounding fabric.
Prepare the Fabric: If necessary, reinforce the fabric around the snap button area with fusible interfacing or a small patch of fabric. This will help strengthen the fabric and prevent future damage.
Attach the New Button: Follow the instructions included with the snap button kit to attach the new button. Typically, you’ll need to insert the socket through the fabric from the wrong side and place the stud on top. metal snap buttons Use a hammer or snap fastener tool to secure the button in place.
Test the Button: Once the new snap button is attached, test it to ensure that it fastens securely and functions properly. If necessary, make any adjustments to ensure a snug fit.
Repair the Existing Button: If the snap button is still in good condition but has become stretched or loose, you may be able to repair it by tightening the metal prongs on the back of the button. Use needle-nose pliers to gently squeeze the prongs together, being careful not to damage the button or fabric.
Reinforce the Button: To prevent the snap button from becoming stretched or damaged again, reinforce the surrounding fabric with fusible interfacing or a small fabric patch. This will help distribute the pressure evenly and protect the button from wear and tear.
By following these steps, you can repair a metal snap button on jeans that has become stretched or damaged, restoring the functionality and appearance of your clothing. If you’re unsure about making the repair yourself, consider seeking assistance from a professional tailor or seamstress.
The Button is Loose: If the button is loose and no longer securely fastens the jeans, it’s a sign that it needs to be replaced. A loose button may cause the jeans to come undone unexpectedly, leading to discomfort or embarrassment.
The Button is Damaged: If the button is cracked, chipped, or broken, it’s time to replace it. A damaged button may not effectively fasten the jeans or may cause irritation or damage to the fabric.
The Button Hole is Worn Out: Over time, the buttonhole on the jeans may become stretched out or worn, making it difficult for the button to stay securely fastened. If the buttonhole is no longer holding the button in place, buttons for jeans it may be time to replace the button or repair the buttonhole.
The Button is Missing: If the button has fallen off or gone missing, it’s obviously time to replace it. Without a button, the jeans cannot be fastened properly, compromising their functionality and appearance.
The Button Does Not Match: Sometimes, a button may need to be replaced simply because it no longer matches the style or color of the jeans. Replacing the button with a new one that complements the jeans can refresh their look and ensure consistency in appearance.
Overall, if the button on your jeans is loose, damaged, missing, or no longer matches the style of the jeans, it’s a good indication that it’s time to replace it. Regularly checking the condition of buttons and making timely replacements can help maintain the integrity and appearance of your jeans.